Category Archives: Dairy Free

Asazuke

浅漬け

Asazuke is a Japanese word which means “shallow pickling.”  My first memory of this dish was when I was a child, seeing this clay crock in the basement with a rock on top. Inside, Mom was making what she called her “cabbage pickle” which she has eaten at least once a day, for over eighty five years.
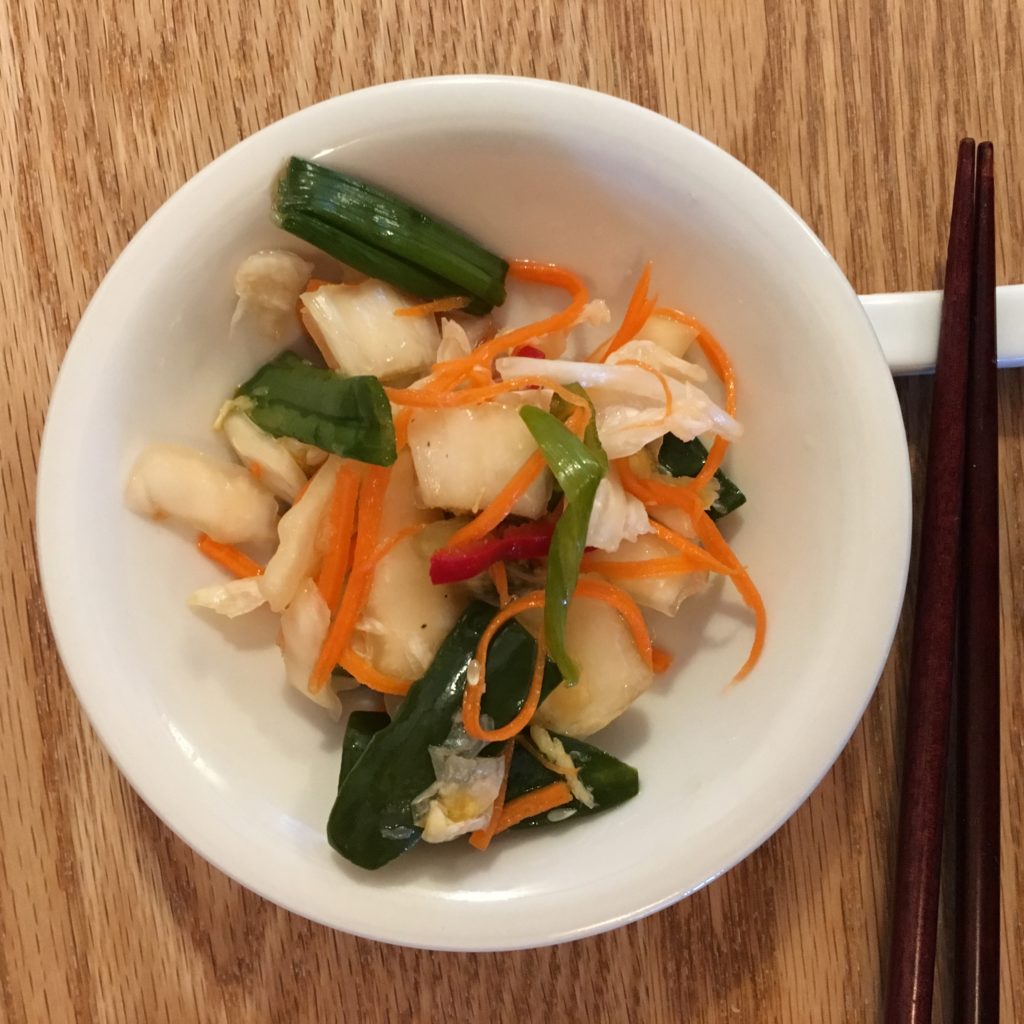
asazuke in a bowl

In Japan, a small dish of pickles and some rice are so commonly served with almost all meals, that a quick pickling method comes in quite handy. What Mom made by the crock, I usually make a few quarts at a time and it lasts me a week or two. It also makes a great healthy stand-alone snack mid-afternoon.

My recipe varies from the traditional recipe because I often eat it at my desk at work and so I keep it a bit milder in order to avoid offending my American colleagues with the aromas of daikon and dashi. Variations are noted below.

You will need:

A very large bowl for mixing, at least 12 quarts capacity

6 clean, sanitized quart size canning jars with lids

Glass jar followers (to hold the pickle beneath the brine)

A tamper or other 1-2″ round rod shaped tool


The Quantity:

This recipe has a lot of variables, depending on the size of the vegetables used. I usually get 4 quart jars, but sometimes more or less. Be prepared to make more brine, use more jars, or use the leftovers for something else.

The Vegetables:

100G キャベツ (1 large head napa cabbage) cut into 3″x1/2″ strips

6-8 scallions cut diagonally, 2 inch strips

2 medium carrots, cut into matchsticks

8 oz daikon radish cut into matchsticks ( I don’t use)

1 large cucumber (10 oz) cut into matchsticks

2-3 oz grated ginger root

6-8 oz red fresno peppers, cut into 1″ – 2″ matchsticks

1 tbspn crushed red pepper flakes

Put the vegetables together in a large bowl with room for tossing.

The Brine:

Juice of 2 Yuzu lemons (or 4 limes)

2 tbspns shoyu or soy sauce

2 tbspns mirin (sweetened rice wine)

4 tbspns sake

optionally, 1/2 cup dashi stock (but I don’t..)

Set the brine aside.

The Pickling:

Sprinkle the veggies with 1 tbspn coarse salt. Mix and massage the veggies vigorously until they are well mixed and begin to bruise and lose water, usually about 5 minutes.

Pack the veggies into the quart jars, cramming them tightly with the tamper until you cannot fit any more in the jar. Leave about 1/2 inch head space at the top of each jar. Depending on the size of your napa, you might need more than 4 jars.

Pour a few tablespoons of the brine into each jar, tamp it down some more to release bubbles. 

Pour a little more brine into each jar, until the veggies are nearly covered. You may need to make more brine to make this happen. Tamp down some more until you see no bubbles rising through the veggies. This provides an anaerobic environment for this mild fermentation.

Place the followers on top of each jar and lightly screw on the caps. This should hold the veggies completely beneath the liquid. If not, add more brine until the followers hold the veggies under the brine. If you run out of followers, I have used small plastic ziploc bags with water to do the same thing. Important: Allow the tops to be lightly screwed on, in order for brine to escape if need be, otherwise, the jars could break.

Place the jars in the refrigerator, on a plate, or bowl to catch any happy brine that overflows and tries to make friends with your other food.

You can begin eating pickle this right away or wait for stronger flavor. I have stored it in the refrigerator for several months. The longer you keep it, the spicier and more fermented it will get. If you don’t eat it by 3 months though, I would toss it and start over. 

Also: Sometimes I save the brine that gets left in the jar after I dish out the pickle, filter it through some cheesecloth and reuse it in my next batch. This considerably speeds up fermentation, so be careful. 
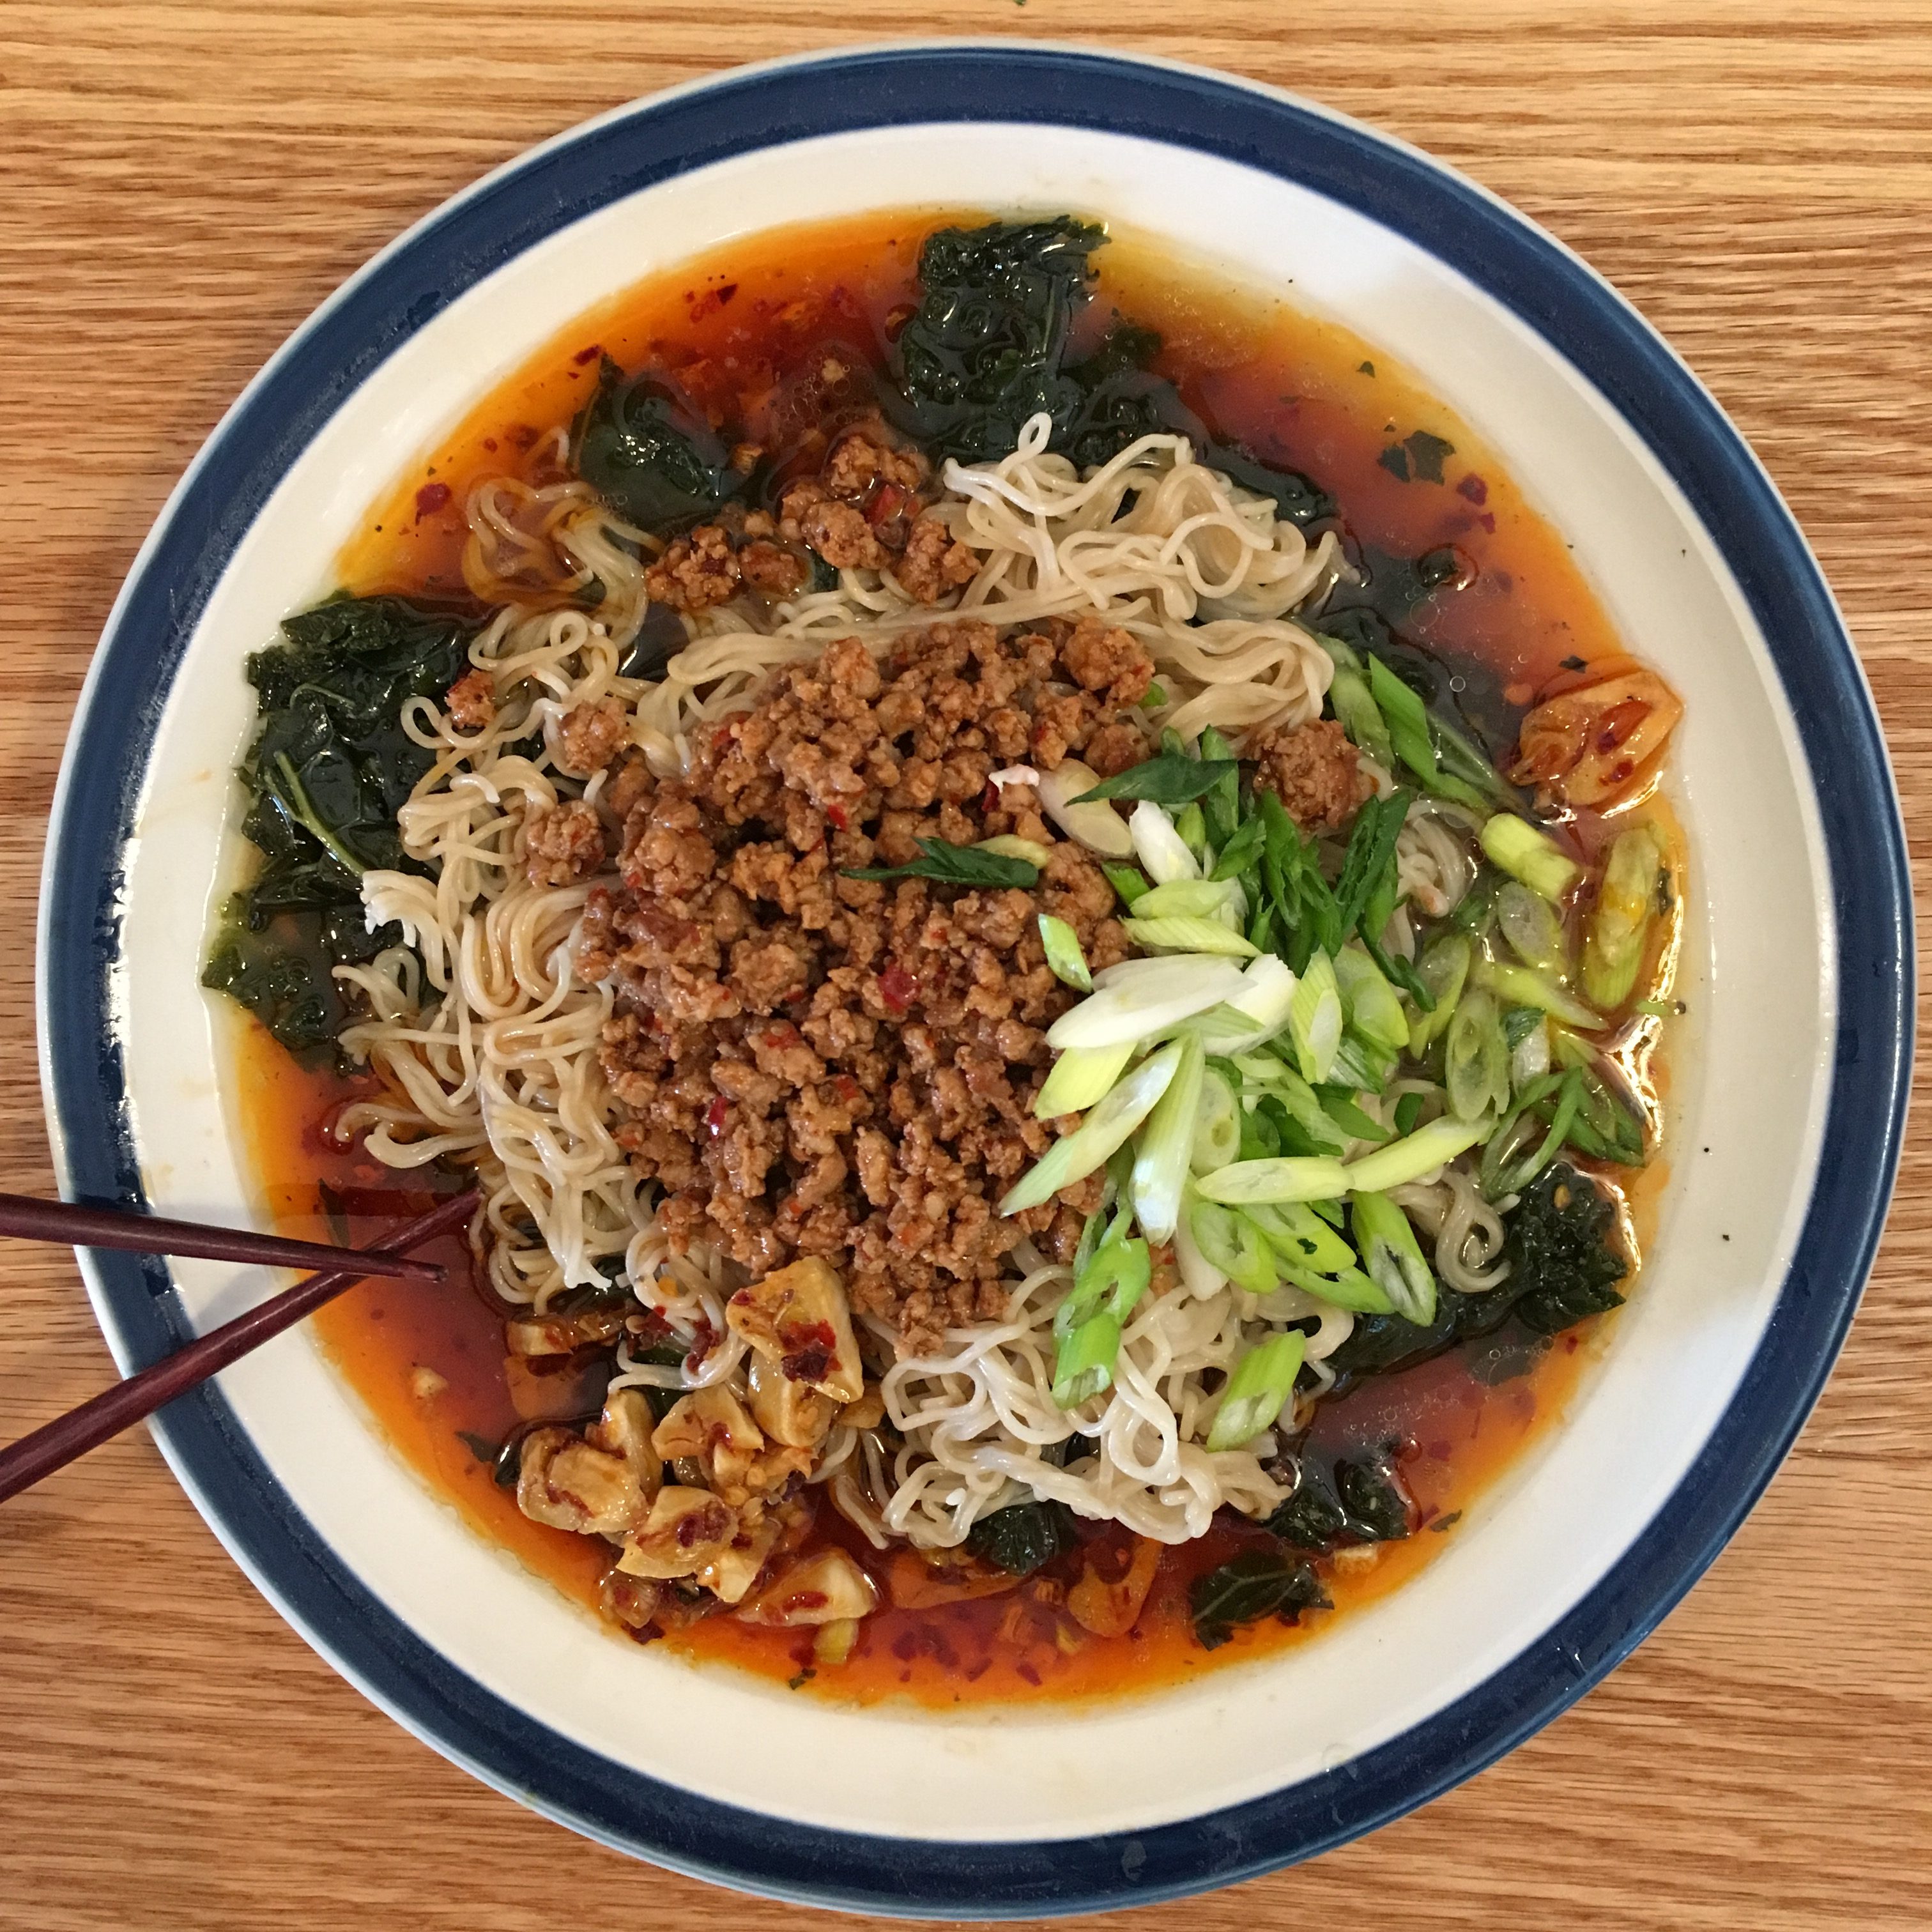


Tantanmen

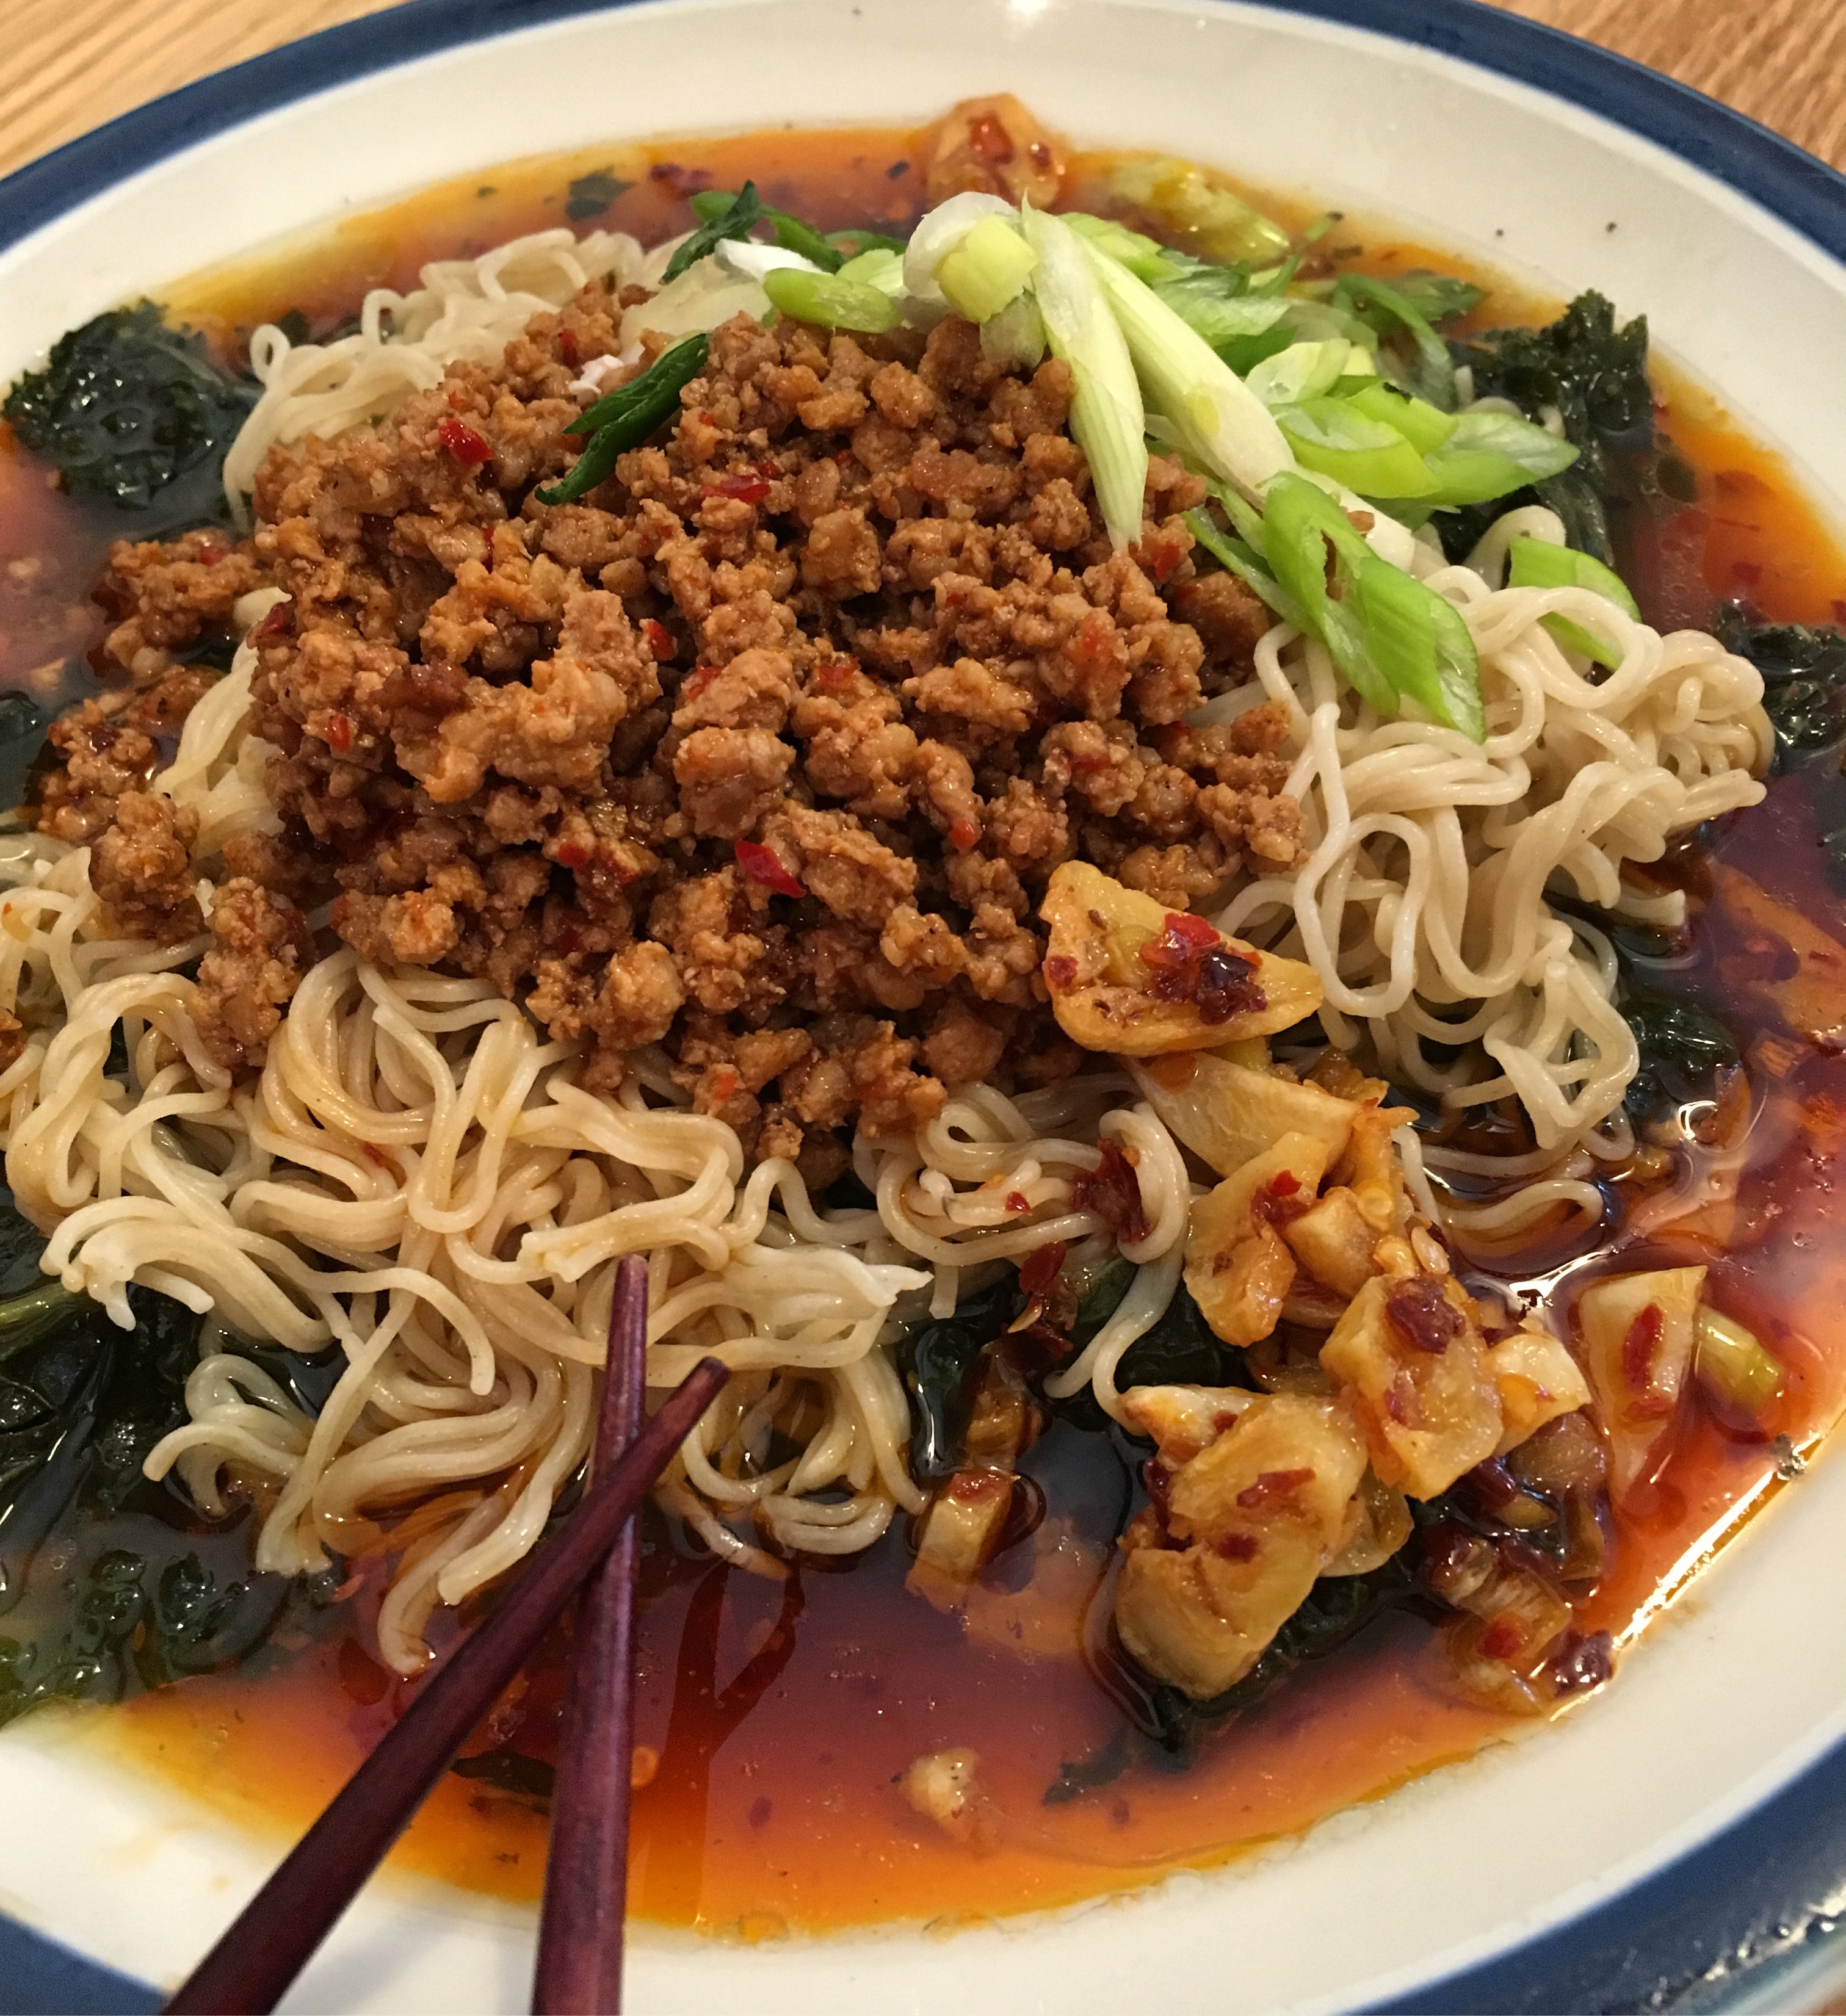
Tantanmen is what noodles were meant for. Garlic, hot pepper oil, pork, onions… Come on!

Tantanmen

This is one of those dishes that has been around so long, there’s a bunch of variations of it. What follows is the recipe I like the most. It serves two:

Ingredients:

2 cups chicken broth
2 servings ramen noodles (we used rice noodles to be gluten free..)
2 tsp sesame oil
2 tsp rice vinegar
3 tbsp shoyu
4 tbsp tahini
2 tsp hot chili oil
2 cloves of sliced garlic

1/2 lb ground pork
4 tsp sake
2 tbsp shoyu
2 tbsp tobanjan (sweet bean sauce)
3 scallions, sliced diagonally
2 cups spinach or kale

The Pork – Pre-heat a wok with teaspoon of sesame oil. Mix the sake together with the ground pork and saute until cooked through.  Add the tobanjan and shoyu to the pork, set it aside.

The Sauce – Saute garlic in the wok with a little sesame oil for about 2 minutes. Put the garlic, sesame oil, tahini, rice vinegar, soy sauce, cooking sake and hot chili oil together in a bowl and set aside.

The Broth – Cook the spinach or kale in the chicken broth until tender, then put to one side.

The Noodles – In a separate pan, cook your noodles al dente (3-4 minutes for ramen usually.)

Plating –  Start with the spinach and broth, adding it to a wide low bowl so you can display it well. Be careful not to put too much broth or else you won’t be able to move the bowls.  Next, place the ramen atop the spinach, leaving a bit of a flat spot in the middle. Next spoon some of the pork in the middle. Next, add the scallions.

Finally, drizzle with the hot chili sauce.  OISHII!

Tantan Noodles


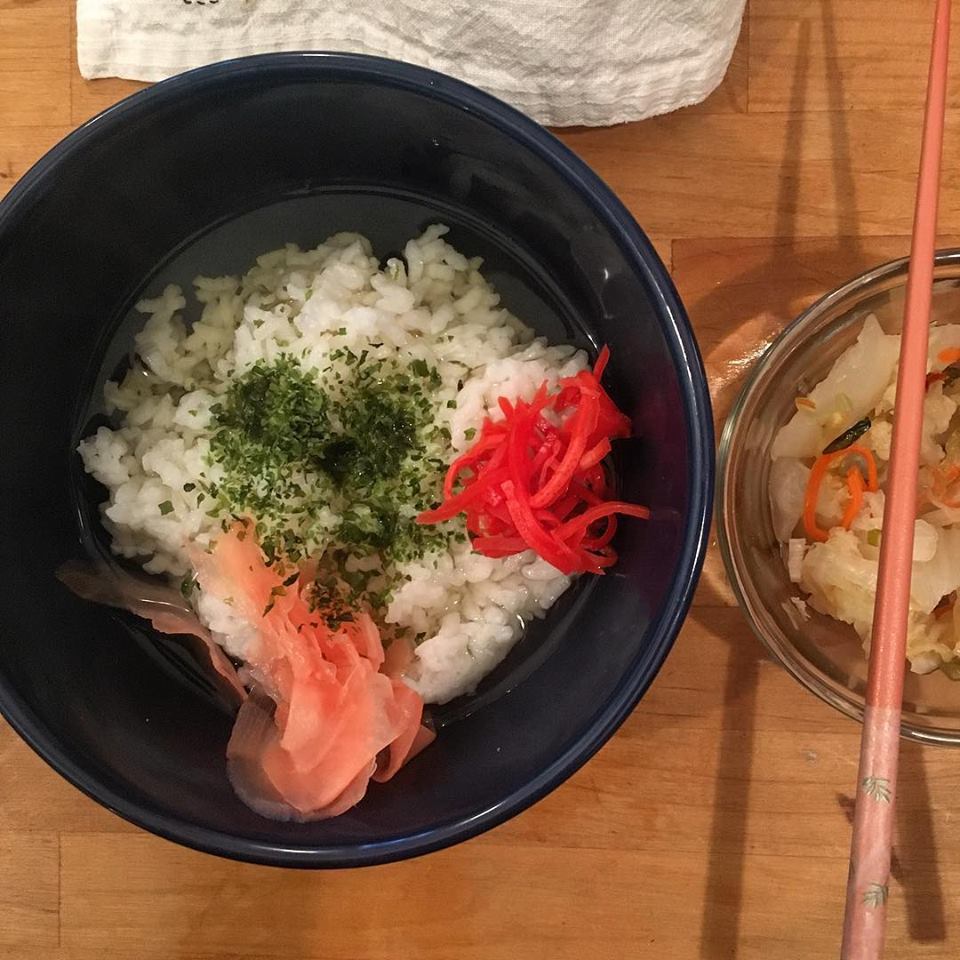
Ochazuke

Ochazuke

Ochazuke is a Japanese dish – “Ochazuke” translated to English would be something like “submerged in tea.”

Ingredients:

1 1/2 cups cooked white rice

1 cup hot Japanese green tea, brewed (Sencha works well)

Assorted Tsukemono (Japanese pickled things)

Sprinkle of Aonori (crumbled seaweed)


So simple! Place the rice in a bowl, pour the tea over it and top with your favorite pickles, aonori and perhaps some fish or eggs. Your call!


Making Kimchi and other fermented foods

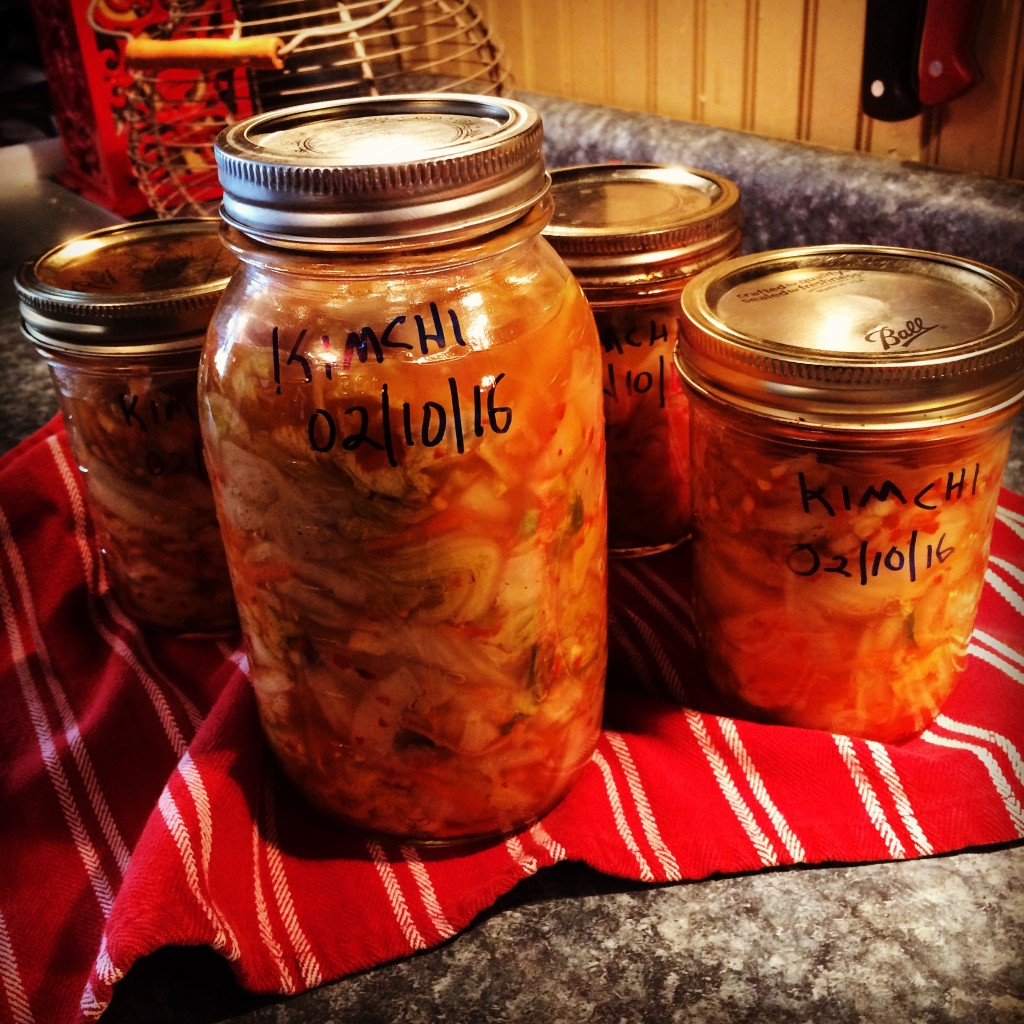
Homemade KimchiHomemade Kimchi

Last summer we had the good fortune to visit relatives living in Japan. For ten days, we toured Tokyo and Kyoto together. We visited countless temples, restaurants. Saw amazing sites and ate some of the most amazing cuisine I’ve ever tasted! There are many reasons that Japanese live extraordinarily long healthy lives, not the least of which is the food they eat: Traditional Japanese meals heavy on the vegetables and are naturally gluten and dairy free. Another thing we noticed was a variety of fermented foods are usually present at EVERY meal, especially breakfast.

This ancient tradition seems likely to have come about as a means of preserving the harvest, but as many in modern times are beginning to realize, the bacterial cultures present in fermented foods have many benefits in terms of digestion, immune system health, detoxification and even increased mental clarity.

As soon as we got home, we began incorporating more fermented food into our diets – store-bought saurkraut, kimchi and pickled radishes.

A few months after we got home, we bought our first crock and began fermenting things for ourselves. Kimchi is my favorite because it’s spicy, but a nice bit of saurkraut is great as a side dish or in a sandwich as well.  I like that we can know where things came from, how they were handled and get to participate in this ancient, wise tradition from my heritage.

Traditional Korean kimchi can contain seafood or meat as well, but we decided to keep it simple. This batch is mostly napa cabbage mixed with some carrots, green onions, garlic and hot peppers allowed to ferment under a brine. Since the vegetables are kept completely covered with brine, not in contact with air, the usual mold and other bacteria that can appear on foods is not able to survive the saltiness and lack of oxygen of the brine, allowing lacto-fermentation to commence, which produces that healthy gut-flora bacteria we all need more of in our diets. (something the yogurt industry is trying to leverage as well, but be careful not to eat yogurt which has sugar added – it counteracts the health benefits of the lactobacillus bacteria by promoting unhealthy bacteria in your system instead!)

Now that our crock is empty again, my thoughts are turning to red onions. Who doesn’t love a nice dollop of pickled onions on their burger?


Gluten Free Recipe: Shanghai Cabbage

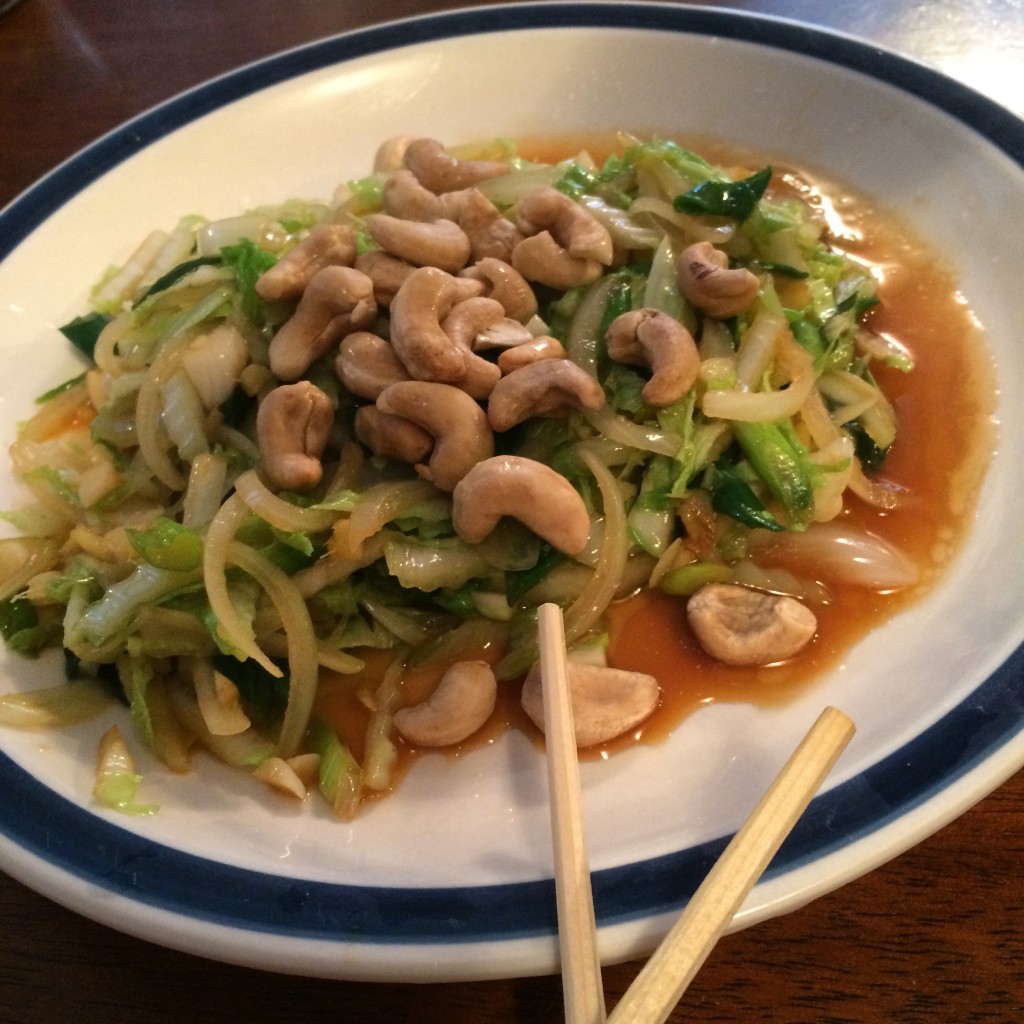
gluten free recipe: shanghai cabbage


Gluten Free Recipe:   Shanghai Cabbage


This recipe is a gluten free version of an old Asian noodle dish called “Noodle Mountain.” I guess you could use rice noodles, but we decided to make it even cleaner by eliminating the noodles all together. As with a lot of Asian recipes, it’s also vegan and dairy free!

Serves 2

Prep time: 20 minutes. Cooking time: 10 Minutes

Ingredients

  • 1/2 head Napa Cabbage, sliced really thin
  • 1 large yellow onion, peeled, sliced really thin
  • 1 bunch Nabuchan Onions or Green Scallions, sliced diagonally 2″
  • 1″ Ginger Root,  peeled and diced
  • 6 Cloves of Fresh Garlic, peeled and diced
  • 1/2 cup raw, Unsalted Cashews
  • Juice of 1 Fresh Lime
  • 1/8 cup Nama Shoyu or Japanese Soy Sauce
  • 3 tablespoons Rice Vinegar
  • 1/8 cup Toasted Sesame Oil
  • 1/4 cup Peanut Oil

Recipe

Make the sauce: Combine the Nama Shoyu, Rice Vinegar and Toasted Sesame Oil in a small bowl. Set aside. Juice the lime into another small bowl. Set aside.

Add 1/4 cup peanut oil to a wok over high heat. The pan is ready as soon as a water drop disappears when you flick into the oil. Quickly add the yellow onions and turn down to medium heat. Saute` the onions until they are translucent, and remove from the pan to a plate.

Bring the pan back up to high heat again and add the cabbage, green onions, ginger and garlic to the pan and toss as you would a salad with tongs or two wooden spoons, until all the cabbage is limp, usually about 5 minutes. Add the yellow onions back in along with the sauce and heat through, about 2 more minutes.

Quickly remove the cabbage mixture to two plates, top with the cashews and lime juice – This tastes best when it’s good and hot.

We like to eat it with chopsticks because it forces us to eat slowly.

Enjoy!


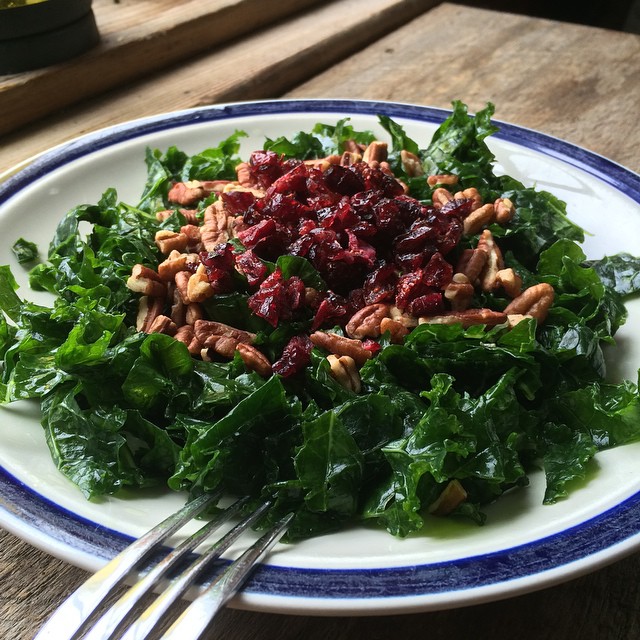
Cranberry Walnut Kale Salad Recipe

cranberry walnut kale salad

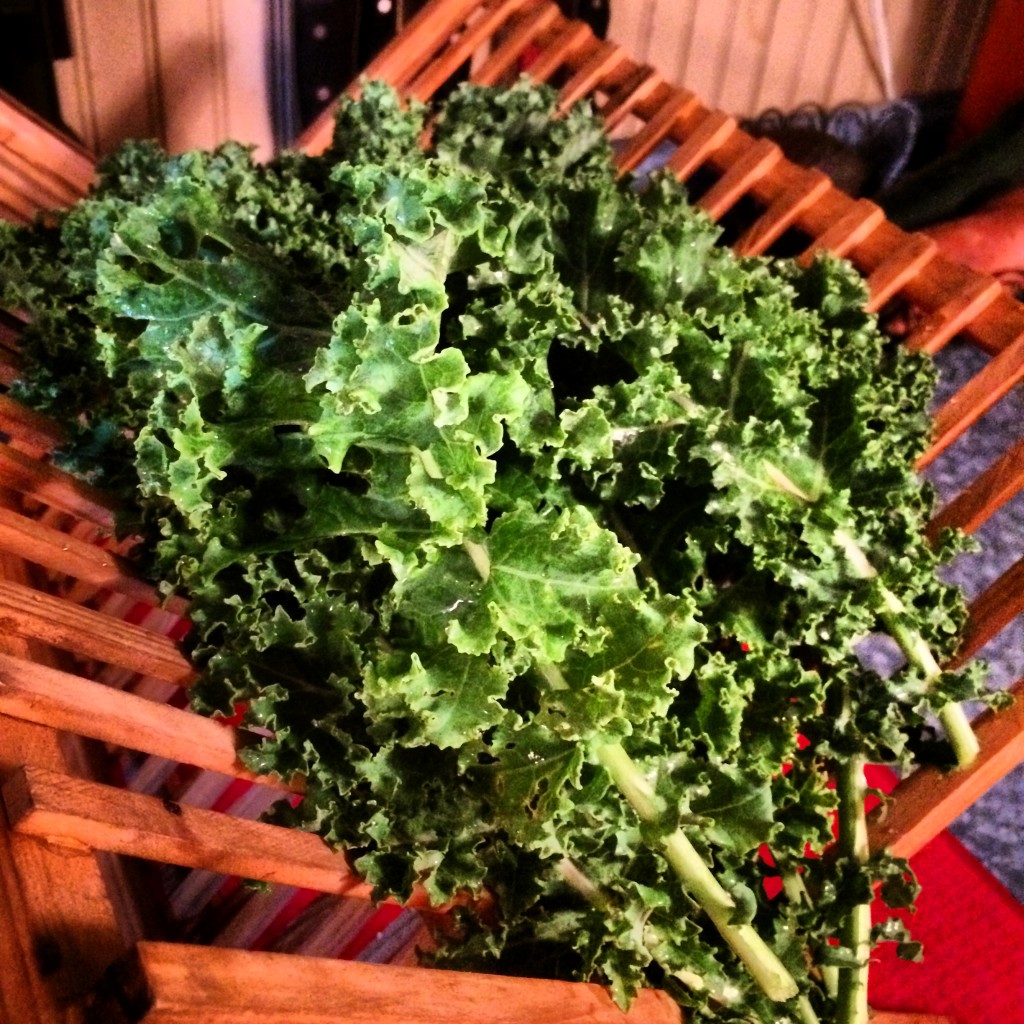
The kale harvest is well underway at Mercy Hill Farm and we’ve got lots of it! It’s available for sale inside our barn and there are SO many ways to enjoy it. Here’s a simple salad I made yesterday for lunch:

Cranberry Walnut Kale Salad Recipe

(makes one large serving or two side servings)

  • 5 or 6 large kale leaves
  • 1/4 cup dried cranberries diced
  • 1/4 cup raw walnuts coarsely chopped

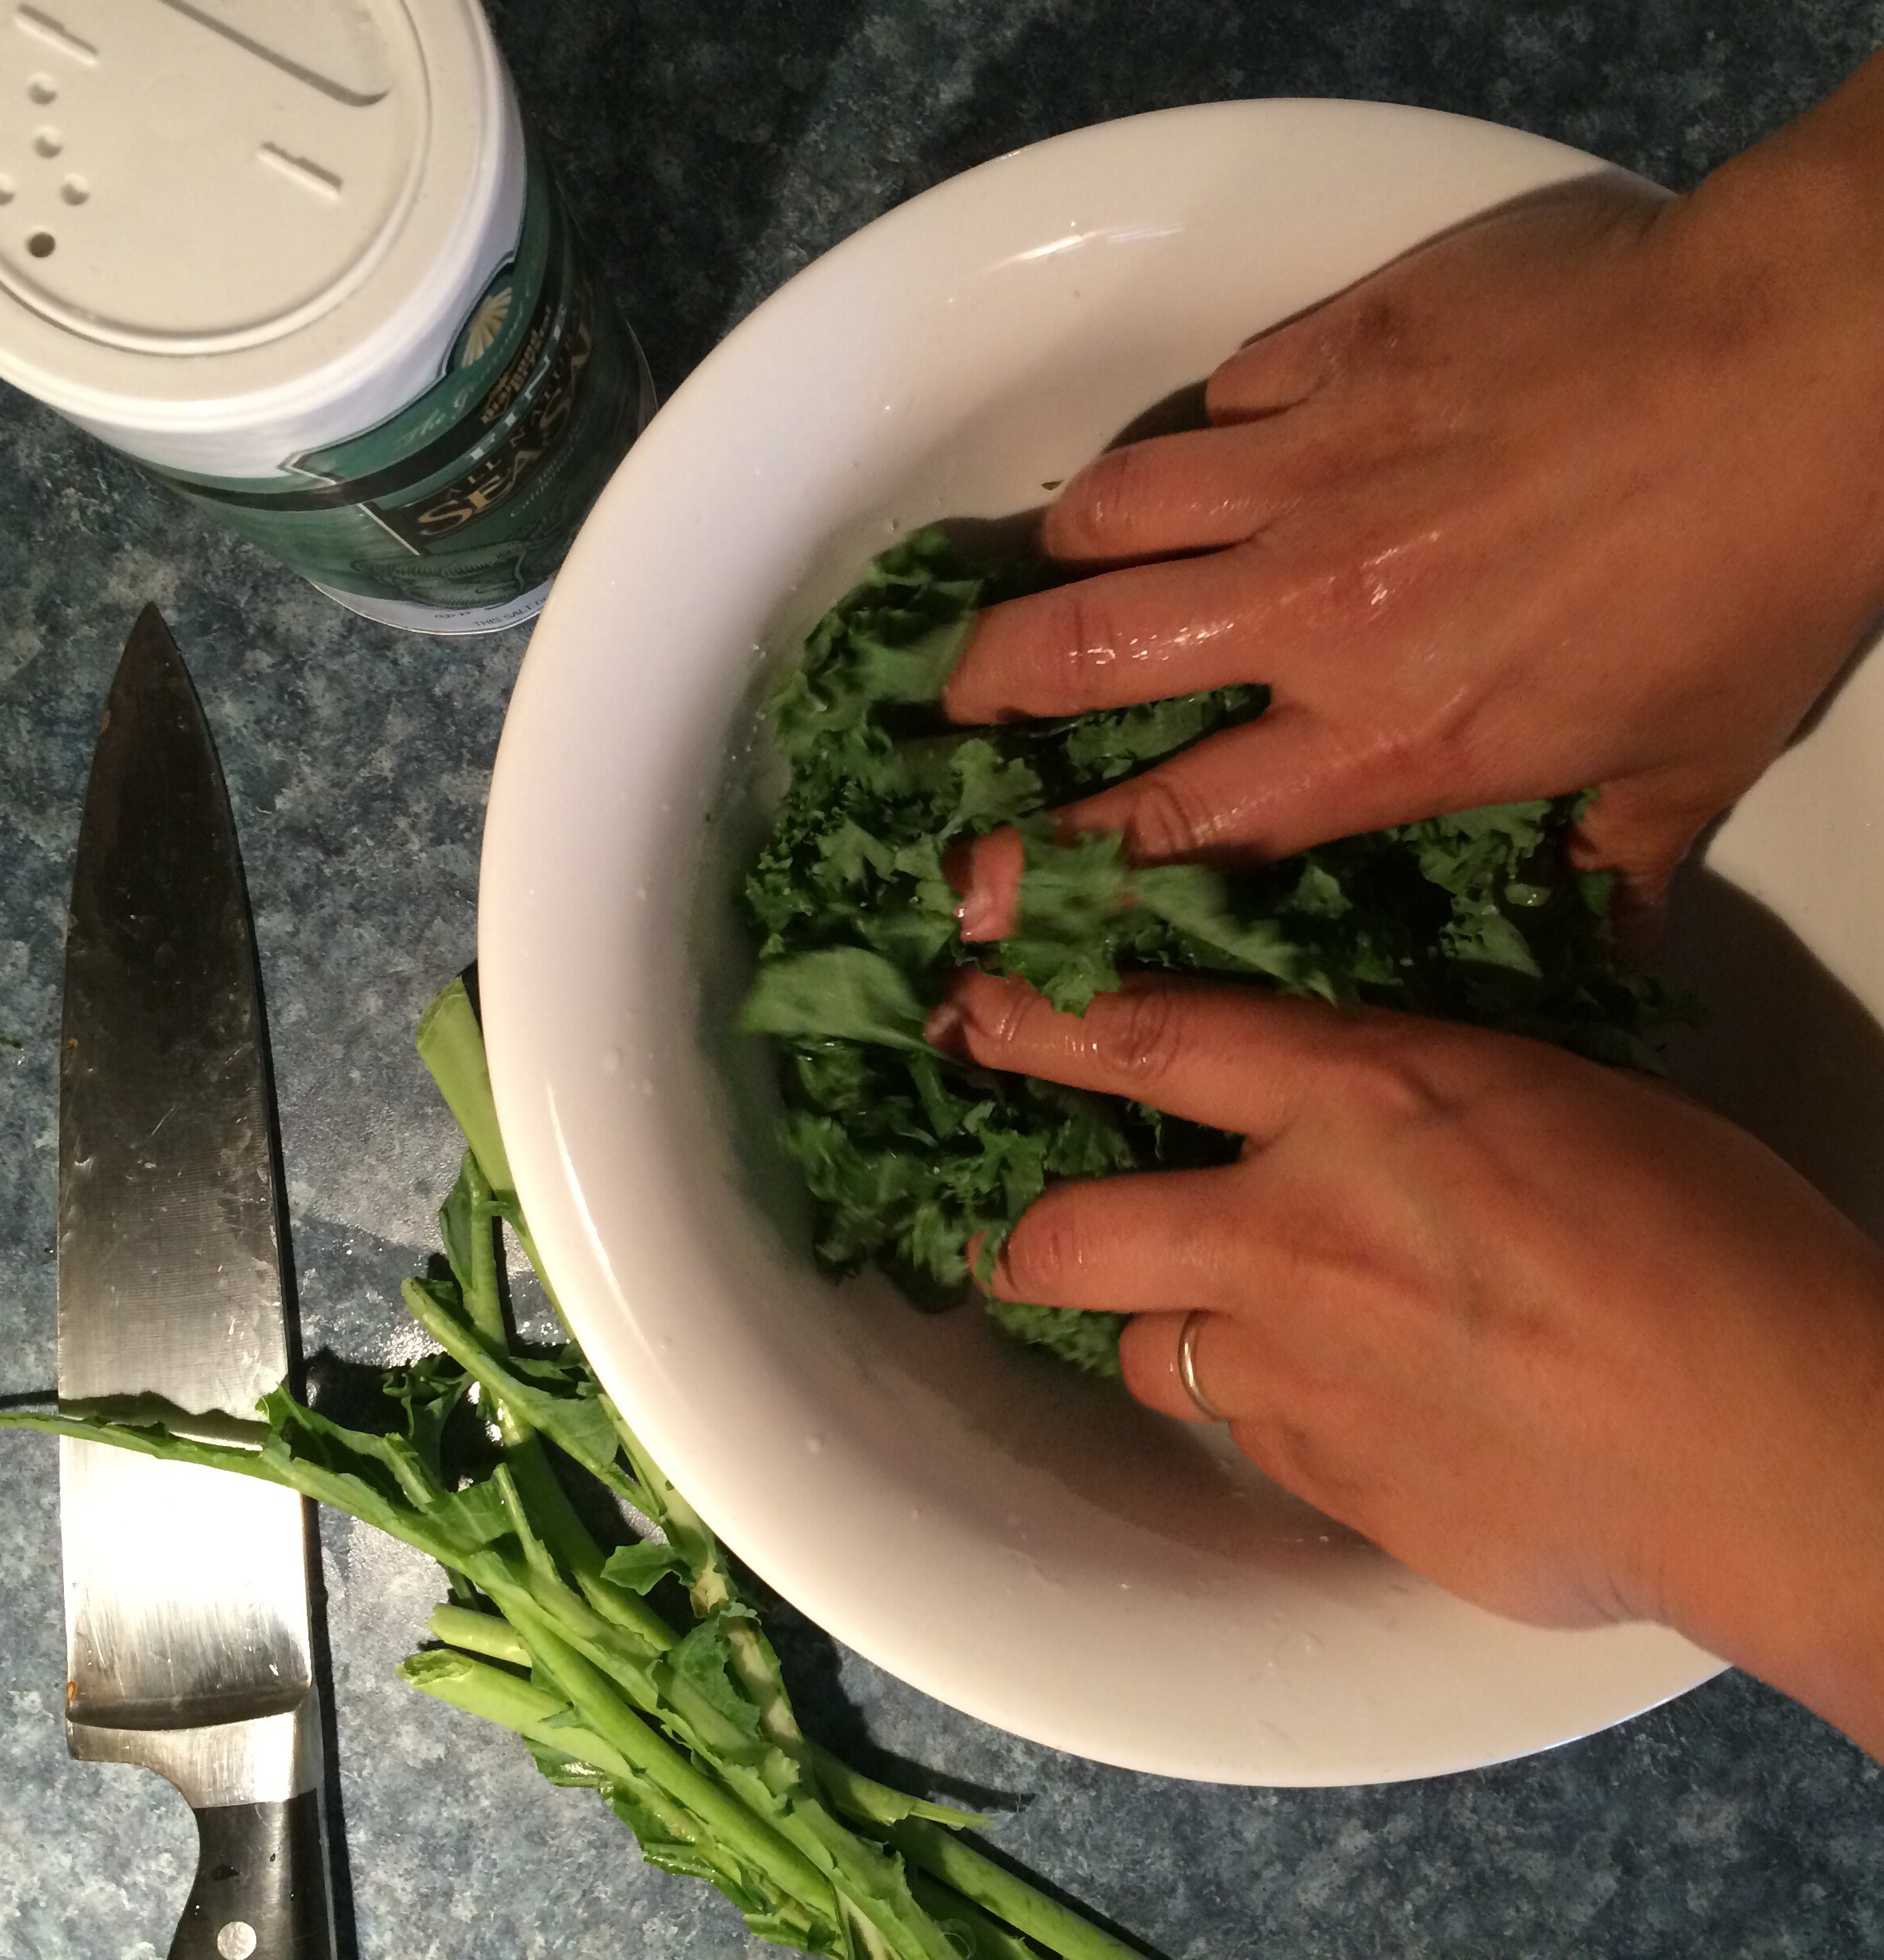
Massaging Your Kale

(this process makes it much tender and tastier in salads)

To prepare the kale, rinse the leaves

massaging kale vigorously under cold water. Discard the thick main stem and cut the leaves into 1″ pieces. Place the leaves in a large mixing bowl. Sprinkle with about a teaspoon of salt. Massage the kale in your hands for about 2 minutes, or until the kale looks like wet seaweed. Fill the bowl with water enough to completely cover the kale. Swish it around for a minute and then remove the kale to a plate. Empty and rinse the bowl thoroughly to remove the salt. Repeat the process at least once to ensure the salt is gone from the kale, and then move the kale to a colander to drain any excess water off. Then your kale is ready to eat as a delicious salad green packed with raw nutrients and fiber!

Honey Dijon Dressing:

This simple dressing is my go-to most days.

(makes 5-6 servings)

  • 6 tbsns cider vinegar
  • 2 tbsns dijon
  • 3 tbpn extra virgin olive oil
  • 1 tsp raw honey (2 1/2 tspns sugar for vegan)
  • 1/2 tspn salt and pepper each

Add all ingredients to a small jar, put a lid on it and shake.

If you have not tried eating kale this way, you really owe it to yourself to give it a try.

kale for sale

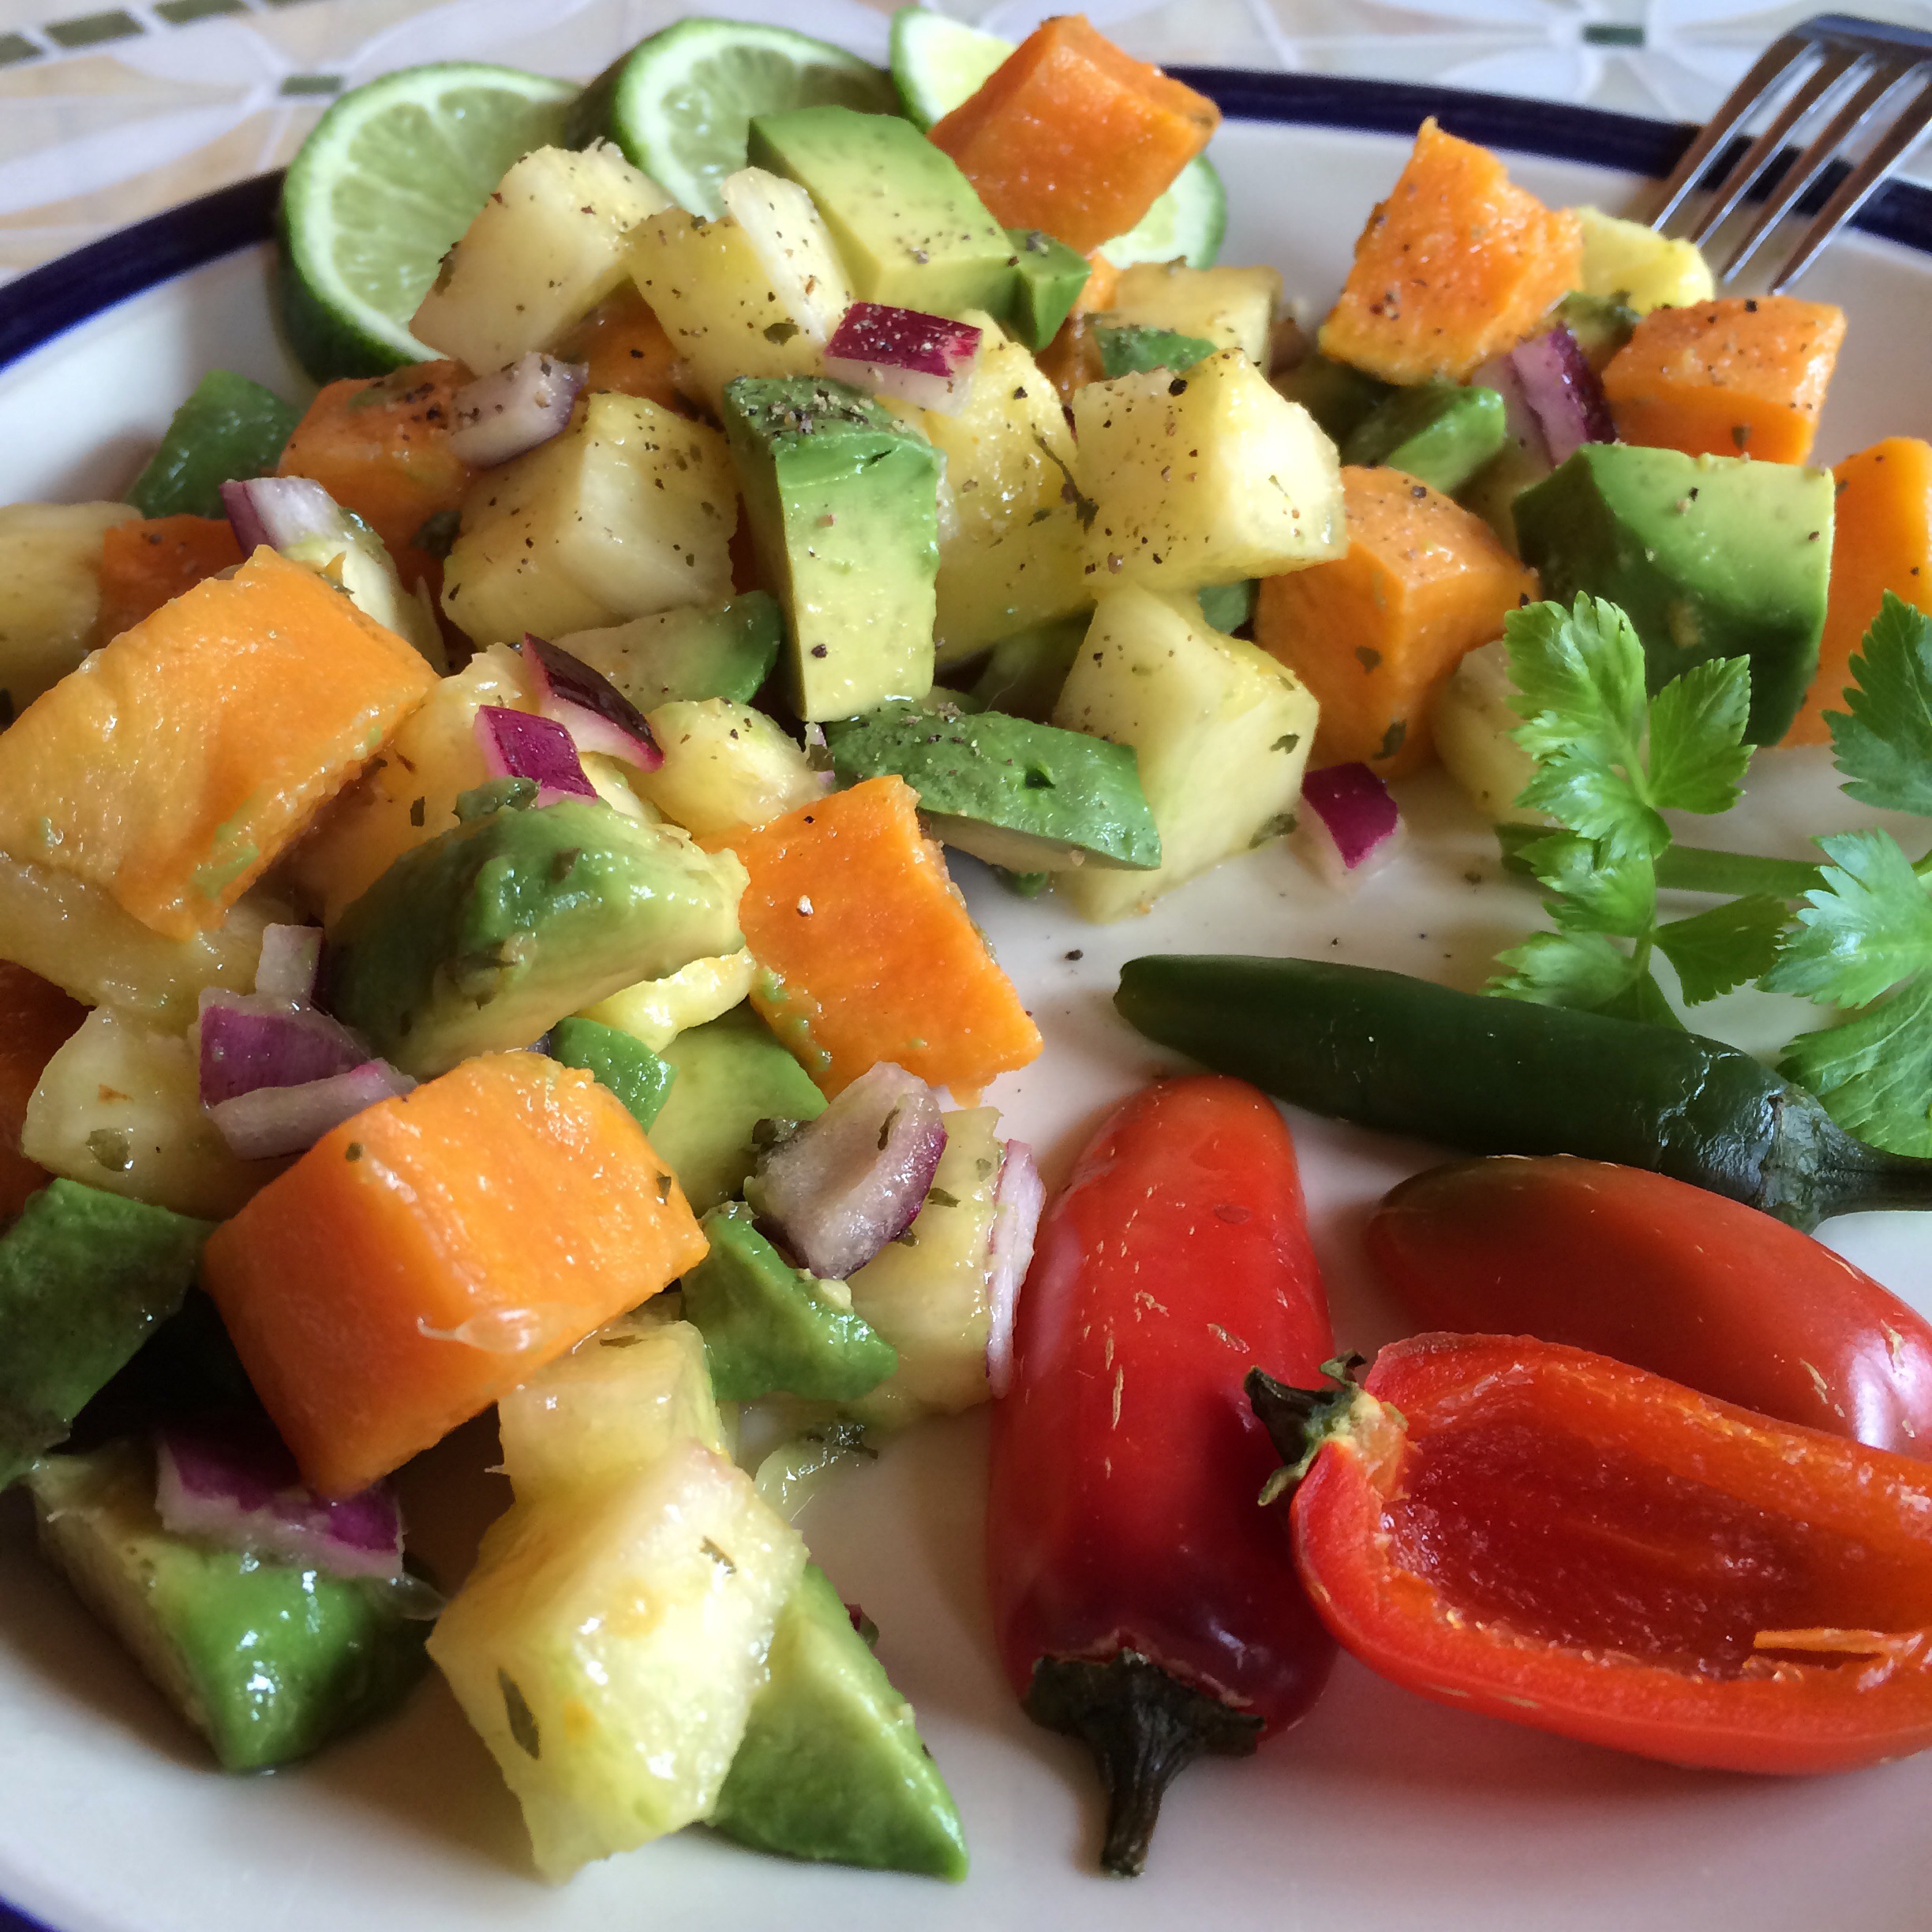
Vegan Recipe: Tangy Sweet Potato and Pineapple Salad with Avocado


It’s springtime in Wolfeboro, New Hampshire. The snowpiles are melting and giving way to early blooming flowers like crocus and daffodil, a welcome, colorful change.

This was partly the motivation for this salad, that and trying to find a satisfying gluten free, dairy free lunch. It also happens to be vegan and very tasty!

Ingredients:

  • 1 ripe avocado, peeled, chopped
  • 1 med. sweet potato, peeled, chopped
  • 2 tbspns finely chopped red onion
  • 1 red and 1 green jalapeño, finely chopped
  • Juice of one lime
  • 1 1/2 cups fresh pineapple chunks
  • 1 tbsn fresh cilantro, finely chopped
  • Freshly ground black pepper to taste

Recipe:

Steam the sweet potato chunks until tender. Then toss all the ingredients together until the lime juice has coated everything.

Serve on a sunny porch with some calypso music playing and think about warmer weather coming real soon!

You might also enjoy this article:

19 Science-backed Health Benefits of Pineapple by Helen Nichols


Noodle Mountain

This is a very satisfying gluten free, dairy free, vegan dish full of flavor and zip.

Serves 4

Ingredients

  • 6oz package rice noodles
  • 1/4c extra light olive oil
  • 2 garlic cloves, peeled and minced
  • 2 inches fresh ginger, peeled and minced
  • 2 medium yellow onions, thinly sliced
  • 2 chiles, finely chopped
  • 8- 10 napa cabbage leaves, finely shredded
  • 4oz bean sprouts
  • 1/4c gluten free tamari
  • Juice of two limes
  • 6 scallions, chopped
  • 4oz raw, unsalted cashews, chopped

Directions

  1. Cook the noodles in a large saucepan according to the package. Drain and transfer to a bowl if cold water. Set aside.
  2. Heat oil in a wok and add garlic, ginger, onions, and chiles. Cook over medium heat for 5 minutes until softened. Add the cabbage and bean sprouts and stir briefly.
  3. Drain noodles well and add to wok. Toss gently then add tamari, lime juice, scallion, and cashews. Mix well. Serve immediately. Use chopsticks!


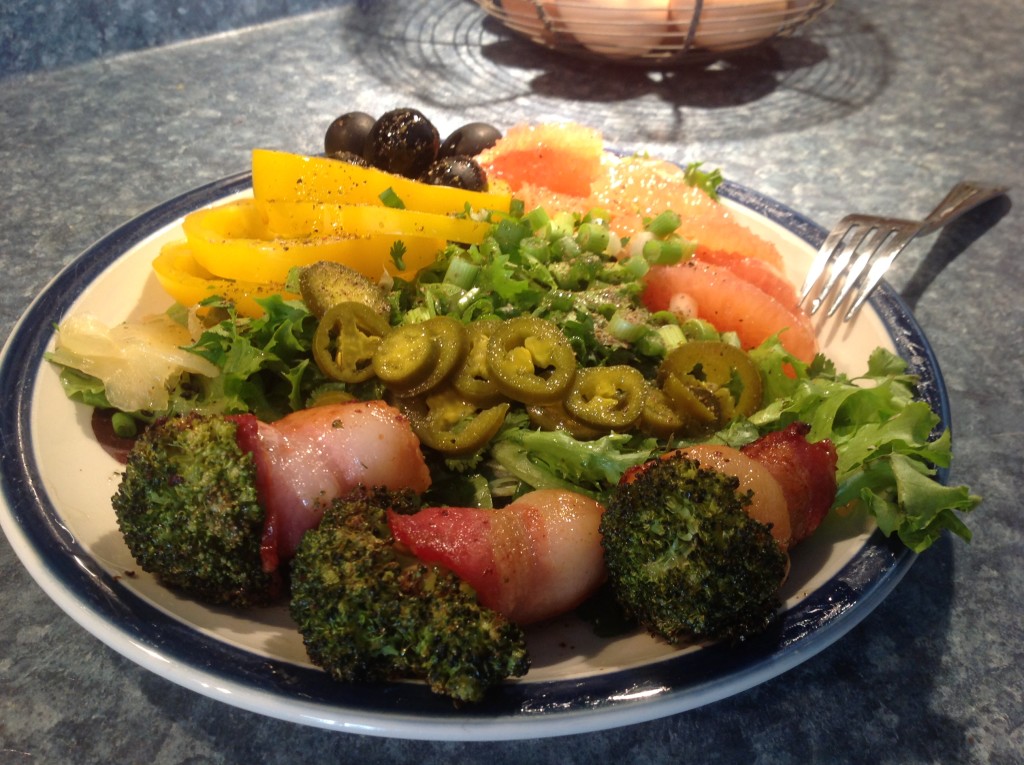
Gluten Free Recipe – Bacon Wrapped Broccoli

Gluten Free Recipe – Bacon Wrapped Broccoli


Bacon Wrapped Broccoli

Salads are great – and can really provide long-lasting energy. Especially if you take the time to add some variety and some satisfying proteins along with all those yummy vegetables.

Here’s a very satisfying addition to today’s lunch salad, that is gluten free, dairy free and paleo friendly. Also – you don’t need many of these as they are very rich and very filling.

Ingredients:

  • Broccoli spears
  • Uncured bacon slices, cut in half

Instructions:

Preheat oven to 425F

Wrap the bacon around a broccoli spear stem, then pin the end into the stem with a toothpick. Cut the toothpick so that just an 1/8 of the end is visible. Three for each person is plenty. Place them in a glass baking dish on their sides.

Bake uncovered for 20 minutes. Remove from the oven and using a basting brush, pick up some of the bacon fat from the bottom of the pan and brush the broccoli heads. Then return to the oven for another 10 minutes or so, or until the bacon is cooked to the desired doneness. This will keep the broccoli from getting too crispy.

When the bacon is cooked, the broccoli will be too. Drizzle the broccoli heads with the remaining bacon fat, let them cool 5 minutes and serve!

Once the broccoli is in the oven, you have time to make an epic salad to be the main course!


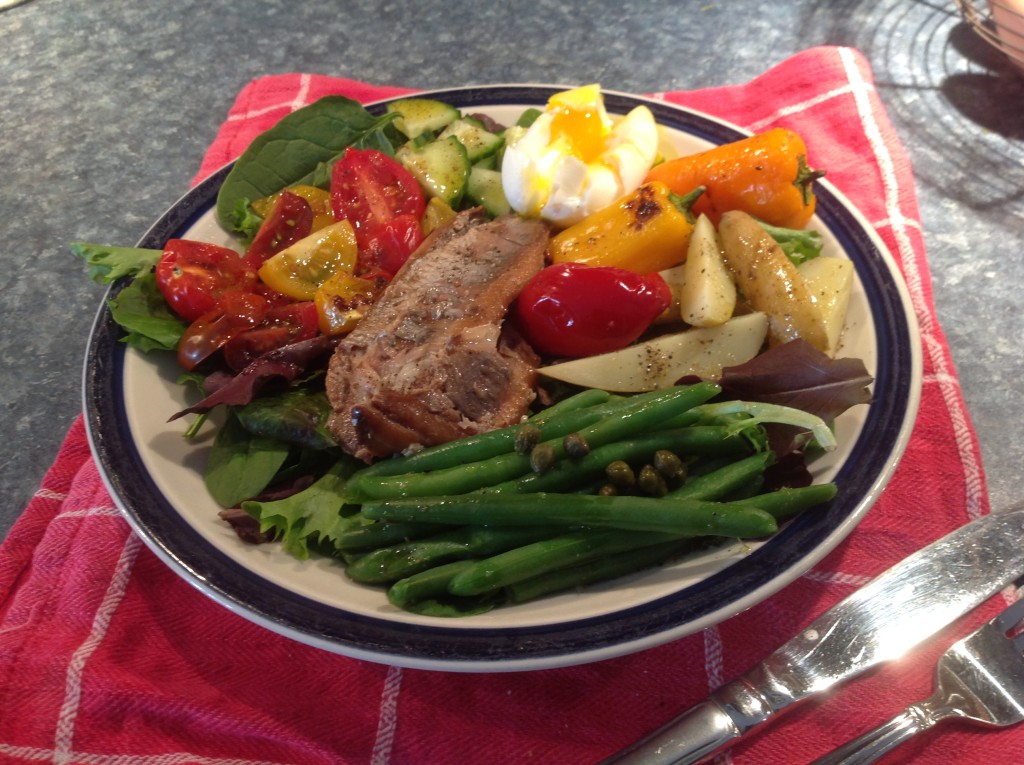
Gluten Free Recipe – Salade Niçoise

Gluten Free, Dairy Free Recipe – Salade Niçoise

Salade Niçoise


Ingredients list:

  • a soft-boiled egg
  • a handful of cherry tomatoes, quartered, slightly seared
  • 10 haricots verts (French green beans), slightly steamed
  • a couple red, orange, and/or yellow baby bell peppers, also slightly seared
  • a couple fingerling potatoes, boiled fork tender then quartered
  • 3 or four slices of cucumber
    1/2 ouce field greens
  • 1/2 ounce baby spinach
  • 1 sardine fillet, packed in oil, drained
  • a teaspoon of capers
  • 3 tablespoons extra virgin olive oil
  • 2 teaspoons red wine vinegar
  • 1/8 teaspoon freshly crushed black peppercorns
  • a pinch of salt

Mix together the olive oil, vinegar, salt and pepper. Arrange everything around the sardine fillet, drizzle with the dressing mixture. Voila. A delicious and hearty gluten free, dairy free meal that will fill you up and give you long-lasting energy for quite a while… and fish breath. (cats will love you)